TUTORIAL: Load data attributes with Mouse Clicks
A recent project at work almost required my creating functionality that loaded content stored in HTML5 data attributes onto a web page with mouse clicks. At that point, I had used data attributes in practice code a bit, but readily admitted to not knowing everything about them.
I did some web searches on data attributes and was shocked at the lack of good, descriptive tutorials on the subject. Although I ended up not using them in the work project, I still spent a few days hacking some related code together (all while taking note of the quirks and cross-browser issues), leading to this tutorial where I use info about my favorite footie teams as a data structure.
Table of Contents
- How data attributes work
- A simple example
- Proper naming of data attributes
- Store the data attributes in a link
- Store the data attributes in multiple links
- Use “getAttribute()” as fallback code for “dataset”
- Conclusion
How data attributes work
Data attributes are attributes that store data in page elements:
<div id="teamInfo"
     data-team="Chelsea FC"
     data-manager="José Mourinho"
     data-home-pitch="Stanford Bridge">
</div>
The element that contains these data attributes (<div id="teamInfo"> in the above-example) has an internal property called dataset that stores these attributes in an object called DOMStringMap (an API introduced with HTML5):
console.log(teamInfo.dataset);
// logs "DOMStringMap {team: "Chelsea FC", manager: "José Mourinho", homePitch: "Stanford Bridge"}"
The values in an element’s dataset property can be accessed individually:
console.log(teamInfo.dataset.team); // logs "Chelsea FC"
console.log(teamInfo.dataset.manager); // logs "José Mourinho"
console.log(teamInfo.dataset.homePitch); // logs "Stanford Bridge"
All of this means we use JavaScript to find these properties and display them on a web page. But data attribute manipulation doesn’t work in all browsers, specifically, Internet Explorer 10 and lower, so we need to write fallback code for those situations.
Before we create our final-production-ready code with fallbacks, we’ll create some incremental examples to gain a better understanding of how all this works.
A simple example (See the demo)
We’ll start by creating code that changes just one set of data attributes with JavaScript. Let’s start with the CSS, which will be applied to all future code samples and demos:
body {
  background: grey;
  color: #000;
  font-family: 'Helvetica Neue', Helvetica, Arial, sans-serif;
  font-weight: 900;
  font-size: 18px;
}

a:link {
  color: #fff;
  font-weight: 700;
  font-size: 22px;
}

a:visited {
  color: #fff;
}

a:hover {
  color: #fff;
  text-decoration: none;
}

.teamListItem {
  display: inline;
  list-style-type: none;
  padding-right: 20px;
}

.dataTarget {
  padding-left: 40px;
  margin: 10px 0;
}
The HTML for this example looks like this:
<!DOCTYPE html>
<html lang="en">
<head>
  <meta charset="UTF-8">
  <title>TUTORIAL: Change "data" Attributes with Mouse Clicks</title>
</head>
<body>
  <a href="#" id="chelsea">Load Chelsea FC Info »</a>

  <div id="teamInfo"
       data-team="Chelsea FC"
       data-manager="José Mourinho"
       data-home-pitch="Stanford Bridge">
  </div>

  <div id="team" class="dataTarget"></div>
  <div id="manager" class="dataTarget"></div>
  <div id="homePitch" class="dataTarget"></div>

  <!-- Note that we're using the oldIE-friendly version of jQuery -->
  <script src="http://code.jquery.com/jquery-1.11.1.js"></script>
</body>
</html>
And the JavaScript for this example looks like this:
var team = document.querySelector("#team"),
    manager = document.querySelector("#manager"),
    homePitch = document.querySelector("#homePitch");

$("#chelsea").click(function(event){

  event.preventDefault();

  // Use the dataset property
  team.innerHTML = teamInfo.dataset.team;
  manager.innerHTML = teamInfo.dataset.manager;
  homePitch.innerHTML = teamInfo.dataset.homePitch;

});
Breaking down the HTML first:
<a href="#" id="chelsea">Load Chelsea FC Info »</a>
In the HTML, clicking on the id="chelsea element will load the content stored in the data attributes.
<div id="teamInfo"
     data-team="Chelsea FC"
     data-manager="José Mourinho"
     data-home-pitch="Stanford Bridge">
</div>
Those attributes are listed inside <div id="teamInfo"> and named data-team, data-home-pitch and data-manager.
<div id="team" class="dataTarget"></div>
<div id="manager" class="dataTarget"></div>
<div id="homePitch" class="dataTarget"></div>
On mouse clicks, those attribute values will be placed inside the three div tags at the bottom. Their ids are: team, manager and homePitch.
Breaking down the JavaScript next…
var team = document.querySelector("#team"),
    manager = document.querySelector("#manager"),
    homePitch = document.querySelector("#homePitch");
For those div tags that we’re placing the data attribute values inside of , we’re using document.querySelector() to store references to them. This will make them easier to find when I start referring to them in this next function…
$("#chelsea").click(function(event){

  event.preventDefault();

  // Use the dataset property
  team.innerHTML = teamInfo.dataset.team;
  manager.innerHTML = teamInfo.dataset.manager;
  homePitch.innerHTML = teamInfo.dataset.homePitch;

});
The $ tells us that we’re using jQuery to bind the jQuery.click method to the link on the web page which, again, is the one with an id of #chelsea. It has a parameter called event passed to it, which we’ll discuss a little later.
When #chelsea is clicked, it accesses the previously-mentioned dataset property of the #teamInfo element and sees the value of all its data attributes. So for example: after it’s clicked, #chelsea sees that teamInfo.dataset.team is direct reference to the value of the data-team attribute in #teamInfo, and that the value is “Chelsea FC”.
The link will then take that value and place it inside the <div> tags that we referenced with querySelector(), all with help of the innerHTML property. So for example: that value of “Chelsea FC” will be placed inside of ` <div id="team">, which is referenced by the previously-created team` variable.
OK…back to the function’s event parameter…
We have to do this so we can use the event.PreventDefault() method in the link. If we don’t use this and the link’s href attribute is set to # (which is what’s happening with #chelsea), then the # will be passed to the URL.
Depending on the page layout, this will force the page to jump to the top. Which we don’t want.
(Side note: read more about event.PreventDefault() on MDN. There’s also the similar event.stopPropagation() on MDN, but that blocks events a little more obtrusively then event.PreventDefault().)
Proper naming of data attributes (See the demo) Here’s one of the quirks of data attributes…
As just mentioned, teamInfo.dataset.team is a direct reference to the data-team attribute…that makes sense. It’s also the same thing with the manager information: teamInfo.dataset.manager is a direct reference to the data-manager attribute.
But those are one-word attributes and our data-home-pitch attribute is two words. So the syntax is different:
homePitch.innerHTML = teamInfo.dataset.homePitch;
It needs to be this way for two-word data attributes due to how dataset works behind the scenes. Specifically, dataset will look at the data attribute names and automatically drop the data- prefix first, removing hyphens next, and finally convert the attribute to camelCase.
To better understand this, look at the HTML for this section’s demo and note that it has a data-homePitch attribute. Click on the “Load Chelsea FC Info »” link and notice that the pitch content loads in as undefined instead of the expected “Stanford Bridge”.
Adjust the code so it says data-home-pitch and it will work fine. But from there, go to the JavaScript and change teamInfo.dataset.homePitch to teamInfo.dataset.home-pitch…you’ll get a browser console reference error saying “pitch is not defined”.
Because of this, I suggest keeping your data attributes and dataset properties at a two-word minimum. data-home-pitch and teamInfo.dataset.homePitch are fine…data-home-team-pitch and teamInfo.dataset.homeTeamPitch may work, but are too verbose.
Store the data attributes in a link (See the demo) The first example separated the link and the data attribute content for the sake of a clearer explanation, but a real-world use case is to store the attributes in the link being clicked on. Using the same CSS, that code would look like this:
The HTML
...
<a href="#"
   id="chelsea"
   data-team="Chelsea FC"
   data-manager="José Mourinho"
   data-home-pitch="Stanford Bridge">
   Load Chelsea FC Info »
</a>

<div id="team" class="dataTarget"></div>
<div id="manager" class="dataTarget"></div>
<div id="homePitch" class="dataTarget"></div>
...
The JavaScript
var team = document.querySelector("#team"),
    manager = document.querySelector("#manager"),
    homePitch = document.querySelector("#homePitch");

$("#chelsea").click(function(event){

  event.preventDefault();

  team.innerHTML = this.dataset.team;
  manager.innerHTML = this.dataset.manager;
  homePitch.innerHTML = this.dataset.homePitch;

});
In the HTML, we’ve taken the data attributes listed in <div id="teamInfo"> and placed them inside the #chelsea link. This means that <div id="teamInfo"> is no longer needed so we can get rid of it.
In the JavaScript, we’ve replaced all the teamInfo.dataset references to this.dataset. this is a direct reference to the #chelsea link context, meaning it sees everything connected to it…including the data attributes.
Store the data attributes in multiple links (See the demo)
In the previous example, we could have used chelsea.dataset instead of this.dataset. But by using this, our code is reusable and lets us create multiple links that use the same functionality.
Still keeping the CSS the same, we can add a few more links to our HTML while slightly adjusting our JavaScript. Clicking on each link will load different info onto our page.
The HTML
...
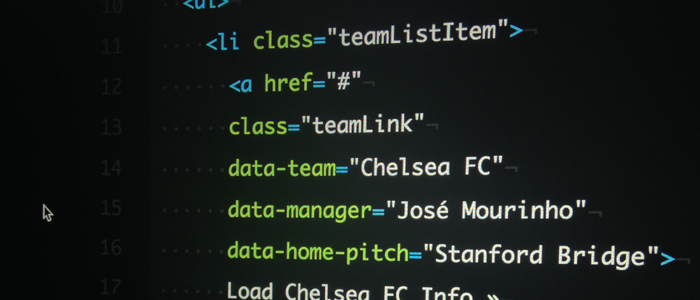
<ul>
<li class="teamListItem">
<a href="#"
class="teamLink"
data-team="Chelsea FC"
data-manager="José Mourinho"
data-home-pitch="Stanford Bridge">
Load Chelsea FC Info »
</a>
</li>
<li class="teamListItem">
<a href="#"
class="teamLink"
data-team="Real Madrid"
data-manager="Carlo Ancelotti"
data-home-pitch="Santiago Bernabéu">
Load Real Madrid Info »
</a>
</li>
<li class="teamListItem">
<a href="#"
class="teamLink"
data-team="AC Milan"
data-manager="Filippo Inzaghi"
data-home-pitch="San Siro">
Load AC Milan Info »
</a>
</li>
<li class="teamListItem">
<a href="#"
class="teamLink"
data-team="Paris Saint-Germain"
data-manager="Laurent Blanc"
data-home-pitch="Parc des Princes">
Load Paris Saint-Germain Info »
</a>
</li>
</ul>
<div id="team" class="dataTarget"></div>
<div id="manager" class="dataTarget"></div>
<div id="homePitch" class="dataTarget"></div>
...
The JavaScript
var team = document.querySelector("#team"),
    manager = document.querySelector("#manager"),
    homePitch = document.querySelector("#homePitch");

 $(".teamLink").click(function(event){

  event.preventDefault();

  team.innerHTML = this.dataset.team;
  manager.innerHTML = this.dataset.manager;
  homePitch.innerHTML = this.dataset.homePitch;

});
In the HTML we’ve removed the id property while adding a class called teamLink for each of our links. We’re also no longer targeting the id in the jQuery.click method and, instead, targeting this new teamLink class.
So every time a link with the teamLink class gets clicked, the this keyword forces our JavaScript code to look at the data attributes for that link only, then load them onto the page.
Use getAttribute() as fallback code for dataset (See the demo)
dateset is awesome but, as mentioned in the beginning, isn’t cross-browser compliant and doesn’t work in all browsers. We can write fallback code with the getAttribute() method for those browsers, specifically IE 10 and lower.
The CSS and HTML stay the same while the JavaScript goes through some changes…
var team = document.querySelector("#team"),
    manager = document.querySelector("#manager"),
    homePitch = document.querySelector("#homePitch"),
    teamValue,
    managerValue,
    homePitchValue;

$(".teamLink").click(function(event){
  event.preventDefault();

  // if "this.dataset" does NOT exist, do this
  if(!this.dataset) {
    teamValue = this.getAttribute("data-team");
    managerValue = this.getAttribute("data-manager");
    homePitchValue = this.getAttribute("data-home-pitch");

  // if but if it does, do this
  } else {
    teamValue = this.dataset.team;
    managerValue = this.dataset.manager;
    homePitchValue = this.dataset.homePitch;
  };

  team.innerHTML = teamValue;
  manager.innerHTML = managerValue;
  homePitch.innerHTML = homePitchValue;

});
We’ve add three new variables without giving them a value: teamValue, managerValue and homePitchValue. From there, we make sure that every time a link is clicked, it first checks to see if our links have a dataset property.
We do this using a JavaScript if/else statement and first check to see dataset does NOT exist by saying if(!this.dataset). If it doesn’t exist, we’ll use the getAttribute() method to find all the data attribute values and store them in the three new variables we just created.
But if the dataset property DOES exist, we’ll just say that those new variables should use dataset to access and store those values like we’ve been doing up to this point.
We’ve made sure that the teamValue, managerValue and homePitchValue variables are properly storing the data attributes values, regardless of whether or not the browser supports dataset. So in order to get those values on the page, we just need to tell our code to look at those variable values and place them inside the elements we pre-defined awhile ago with document.querySelector().
Conclusion This was a very basic data attribute implementation and, quite frankly, data attribute implementations should be simple. Each link isn’t overloaded with data attributes that have over 100 character lines of copy.
Were that my data structure or something even more complicated, I would use a pure JS implementation and ignore data attributes. That was my opinion at the start of this but reading well-respected developer Divya Manian’s excellent dataset post justifies my feelings.
But for simple data structures, using data attributes will certainly fit your simpler use cases, especially if you need to load them with a mouse event. So there are many reasons to add them to your production code, and I hope this tutorial helps you.